
The Plesk WordPress Toolkit is not just some random control panel auto-installer for WordPress. It is a highly sophisticated WordPress management suite that takes the pain out of managing your WordPress instances. In this Plesk WordPress Toolkit Guide we will cover all the features in detail. The interface is super user-friendly and intuitive but if you get stuck you can refer back to this article. If you haven’t used it yet this is your chance to get to know this fantastic software.
In the Toolkit you can, of course, install WordPress. You can also import WordPress installs from other servers and set secure file permissions on the instance as a whole. Set WordPress to auto-update its core, but also auto-update plugins, and even themes. The Toolkit will clone your website to a staging site and sync data back to your main website. Need to enable and manage Nginx caching, set Maintenance mode, activate Debugging and set-up Password Protection? It even comes with a file manager and database management. Let’s dig in.
Accessing the Plesk WordPress Toolkit
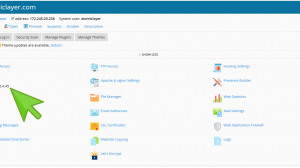
Clicking on WordPress in Plesk’s left-side menu will take you to a list of all your WordPress instances. If you have already installed WordPress the toolkit’s main features will be listed on the main Websites & Domains page.

Click on WordPress in the left-side menu and select the WordPress instance to edit,. Or click on your WordPress instance’s name (default is MY CMS). You will be taken to the main Plesk WordPress Toolkit page. I have numbered the features we will cover for easy reference.

Please note that sites setup by HostNexus have SSL disabled. This is necessary to view and access your WordPress dashboard on your Preview URL If you add a domain and install WordPress you should ensure SSL is disabled in Plesk’s Hosting Settings. When your testing phase is complete you will be ready to make your site live by changing DNS/nameservers. This is the time you should be activating SSL on your domain.
(1) Installing WordPress
In the Install dropdown menu there are two install options.

Install (Quick) – This will install the latest version of WordPress in the location you specify. A random Administrator username and password will be generated.
Install (Custom) – This will allow you to to install WordPress and set the following:
- Set install location
- Set Administrator username and password
- Choose WordPress version
- Install a Set. Sets are collections of preinstalled plugins. Select a set and you’ll be able to view the set’s contents.
- Site name
- Interface language
- Database, name, user and password
- Database table prefix
- Enable Core updates
- Search engine visibility (instruct crawlers not to index your site)
- Enable Debug mode
(2) Security Status
A default install of WordPress is built with the following security enhancements:

- Administrator’s username – WordPress is not setup with the insecure “admin” username.
- Database prefix – The insecure “wp_” table prefix is not used.
- Security of the configuration file – Disables HTTP access to wp-config.php in the event of web/PHP failure.
- Directory browsing permission – Listing of directory contents is always set to Off in Plesk.
- Security keys – Setup of the AUTH_KEY, SECURE_AUTH_KEY, LOGGED_IN_KEY, and NONCE_KEY.
There are 5 security settings that you should review and apply. Some are best practices and one is absolutely critical. All but one can be rolled back. Some may affect WordPress usability.

- Security of the wp-content folder – This restricts PHP scripts from being executed in /wp-content. Enabling this may stop some plugins from functioning.
- Security of the wp-includes folder – This restricts PHP scripts from being executed in /wp-includes. Generally safe to enable.
- Permissions for files and directories – CRITICAL. Set all files to 644 and directories to 755. Set wp-config.php to 600.
- Turn off XML-RPC pingbacks – Turns off XML-RPC pingbacks for the entire WordPress website and also disables pingbacks for previously created posts with pingbacks enabled.
- Disable scripts concatenation for WP admin panel -Sets (‘CONCATENATE_SCRIPTS’, false) and protects against a few know WordPress exploits (like CVE-2018-6389).
(3) Updates
Clicking on View next to Updates will show you any outstanding updates. Click on Update Settings to configure how you want WordPress to update.

Set your update preferences for WP core, plugins and themes.
Update WordPress automatically
- No is not acceptable here.
- Minor Updates – Upgrade 4.8 to 4.8.x bit not 4.9.
- Minor and Major Updates – Upgrade to all versions.

If you are an active WordPress user and keep tabs on the general WordPress ecosystem you should set this to Minor and Major Updates. A safer option is to set Minor Updates. At the time of writing this guide we are at an interesting crossroads. WordPress is currently 4.9.7 with 4.9.8 due in a few days. WordPress 5.0 could be released as early as August and brings with it the biggest change in WP core to date – Gutenberg. This 5.0 update is going to break a lot of sites as many plugins and themes are not compatible. As an active WordPress user I have made sure all our plugins and our theme will be compatible. However, most users won’t be as proactive and this presents a bit of a dilemma.
Usually I would recommend Minor and Major Updates for everyone on Managed WordPress Hosting. If you have sought out a WordPress optimized host the chances are you care a lot about your infrastructure and keep tabs on WordPress development. With the upcoming 5.0 update everyone should exercise caution. If you are sure you are ready for Gutenberg you will be fine with Minor and Major Updates. If you haven’t tested Gutenberg yet you should leave this on Minor Updates.
Update plugins automatically
Insecure plugins are the leading cause for website hacks and malware. The Plesk WordPress Toolkit gives you the power to update your plugins automatically and should be enabled. Most people have not altered their plugins so they should always be kept up to date.

If you want to keep most of your plugins up to date but have some plugins that you don’t want to auto-update you can achieve this with a plugin like Automatic Plugin Updates. I covered this and provided more information on keeping plugins safe in this post.
Update themes automatically
This feature applies to themes listed in the WordPress Theme Repository. If you use a premium theme your theme’s author has probably included a method for you to keep your theme up to date. If your theme’s update mechanism is hooked into WordPress it can auto-update by this function. If your theme has an update and it appears on your WordPress dashboard’s Updates page Plesk will auto-update it. For example our own theme behaves like this. And since the files are unmodified it is safe to auto-update.

(4) Login and Administrator Setup
The Plesk WordPress Toolkit gives you the ability to access your WordPress dashboard without having to login. By clicking on [Setup] you can view Administrator passwords and reset them.
Accessing the WP dashboard via your temporary URL
If you have yet to change your nameservers and wish to access the WordPress dash you will find that the auto Login feature does not work. To access the dashboard find your Preview link on the main Websites & Domains page of Plesk.

Open your Preview URL and add /wp-login.php. In our example this would be:
http://96.125.178.146/plesk-site-preview/wpnex.us/96.125.178.146/wp-login.php.
If your WordPress was installed by us when your account was set up or you have installed WordPress with Install (Quick) a random admin username and password will have been generated. In the WordPress Toolkit click on [Setup] next to Log in. Your random username will be displayed. Click on the “eye” icon to view the password.

As I noted at the beginning of this article your Preview URL and access of the WordPress dashboard on the preview URL will not work correctly with SSL enabled in Plesk’s Hosting Settings. Please make sure this is disabled during your testing phase. If you have set up WordPress with the domain’s SSL option enabled in Hosting Settings your siteurl and home URLs will be set to https in your WordPress database. You will then find that your preview URL redirects to your main site or otherwise you can’t login to your WordPress dashboard. In this case you will need to edit these variables to http via phpMyAdmin.

Some caching and optimizing plugins that aggregate CSS and JS will add your domain’s base URL instead of a relative path. This can cause display issues depending on how your old web server is setup (Access-Control-Allow-Origin headers restricting content for example). Try disabling these plugins while in your testing phase and enabling them when your domain is live on our server.
Finally, please note that in Settings > General the two variable WordPress Address (URL) and Site Address (URL) will list your Preview URL. This is purely because you are accessing the dashboard on the preview URL. When your site is live on our server and you access your dashboard normally you will see it display your domain correctly. Once live or testing complete you can set the two fields to https and activate SSL support in Plesk > Hosting Settings
(5) Clone – Staging Sites
Manually cloning a WordPress instance requires a lot work. The new domain has to be set up and files copied or uploaded with FTP. A new database has to be set up and the existing database needs to be exported and then imported into the new database. The Plesk WordPress Toolkit does all this heavy lifting and it takes a couple of clicks. It will clone your website’s files and database to a new or existing location and change all your URLs to point to the new address. Your dashboard access details also remain the same. If you are cloning to a new subdomain that hasn’t been set up the Toolkit will do that for you. You can also clone to another domain or subscription listed in your account. Click on Clone in the WordPress Toolkit and let’s take a look at some of these awesome features.

By default the Plesk WordPress Toolkit will clone your WordPress instance to a subdomain called staging.domain.com. If you need a different domain click on the link for the new subdomain and you can enter a new subdomain. You can even clone to an existing domain or subscription in your account. Lastly you can also edit and choose a different name for your new database.

If you do elect to clone to an existing domain and WordPress is already installed the Toolkit will give you a warning. Also note that the Toolkit will still create a new database for this clone so the target domain will end up with 2 databases. You can easily verify which one is used by looking in the Toolkit and clicking on Database and then simply remove the old one if necessary.

Sit back and watch the Toolkit do its magic.

Remember to set up Password Protection on your staging site so search engines won’t crawl and index it! This is also covered later on in the Plesk WordPress Toolkit guide. If you create your staging subdomain through the Clone feature remember to activate a free Let’s Encrypt certificate for it. Lastly go into Hosting Settings for that subdomain and activate SSL.
(6) Sync
The Plesk WordPress Toolkit removes any hassle of synchronizing changes made on your development site to to your production site. Once you’ve worked on your staging site it’s now time to make those changes live. Go to the Toolkit for your staging site and click Sync.

In this case I previously cloned the WordPress instance to a staging subdomain called staging.wpnex.us. But what if you only made file changes and want to keep the database intact on your production domain? Or you made database changes and don’t need to sync the files? The Plesk WordPress Toolkit has all scenarios covered. It can even synchronize selected tables of your database.

(7) Search engine indexing
This is enabled by default and doesn’t modify any WordPress settings. If you are working on a staging site and don’t want search engines to index your staging site’s content set this to disabled. If your staging site gets indexed by Googlebot your main site may get penalized for duplicated content. Toggling this option off enables the “Discourage search engines from indexing this site” option in WordPress > Settings > Reading. What this does is add “noindex, nofollow” tags to your website’s header and adds the Disallow directive to the virtual robots.txt file. However, you should know that it up to the search engine spiders to honor this request. Rather than risk it I like to cover all the bases when setting up a development site. I will toggle this option off in the Plesk WordPress Toolkit but I will also block bots with .htaccess.
1 2 3 4 5 6 7 8 | # Stop indexing of dev site
Header set X-Robots-Tag "noindex, nofollow"
RewriteEngine on
RewriteCond %{HTTP_USER_AGENT} AltaVista [OR]
RewriteCond %{HTTP_USER_AGENT} Googlebot [OR]
RewriteCond %{HTTP_USER_AGENT} Bingbot [OR]
RewriteCond %{HTTP_USER_AGENT} msnbot [OR]
RewriteCond %{HTTP_USER_AGENT} Slurp |
The final step is to password protect your site which will keep out bots as well as unwanted visitors.
(8) Caching (nginx)
Nginx caching is enabled by default on all domains set up by HostNexus (i.e. new account creation). If you want to disable Nginx caching you can toggle it off here.

Getting Nginx to correctly cache your website will have a dramatic impact on performance. However, it will require a bit of trial and error on your part. Clicking on Setup will take you to caching options page. Please read our Nginx caching tutorial for help in setting this up and testing.
(9) Maintenance mode
When a WordPress website enters maintenance mode, the website’s content is hidden from visitors without being changed or otherwise affected. Visitors accessing your website when it is in maintenance mode see the maintenance page instead of the website content. To manually enable maintenance mode usually requires editing your theme’s functions.php. Now you can just toggle it ON in the Plesk WordPress Toolkit. If you click on Setup you can customize the appearance of your maintenance page. The maintenance page customiser has some built in options but you can also upload your own code by clicking on Customize at the top. Please be aware that you first need to create a directory called “maintenance” in your /wp-content directory. And inside this maintenance directory you will create a file called template.phtml.

In the in-built customiser you can:
- Add a page title
- Add some title text (larger font size)
- Add some content text (smaller font size)
- Set a countdown timer
- Set custom links for social media

This is the default Plesk maintenance page for WordPress:

(10) Debugging
Debugging is intended for use by developers and should not be used on production websites. Traditionally debugging in WordPress involving manually editing wp-config and setting up the debugging global constants WP_DEBUG. SCRIPT_DEBUG and SAVE_QUERIES. The Plesk WordPress Toolkit allows you to manage all important debug options on a per instance basis from the Toolkit interface.
Debugging should be done on a staging site. To set that up use the Clone function and follow the steps above. Then in the Toolkit for your staging site activate Debugging and click Setup to configure the type of debugging that you require.

The options below allow you to manage the native WordPress debugging tools which are enabled in the wp-config.php file:
- WP_DEBUG – Enable the main debug mode in WordPress
- WP_DEBUG_LOG – Save all errors to the debug.log file inside the wp-content directory.
- WP_DEBUG_DISPLAY – Show debug messages inside the HTML pages
- SCRIPT_DEBUG – Force WordPress to use the non-minified versions of core CSS and JavaScript files. This is useful when you are testing changes made to .js and .css files.
- SAVEQUERIES – Save database queries to an array that can be displayed to help analyse them. Note: that this will have a noticeable impact on the performance of your site, so it is not recommended to leave this option enabled when you are not debugging.
Please refer to the WordPress Codex documentation Debugging_in_WordPress for more information on these options.
(11) Password Protection
If you need to restrict public access to your website and require all visitors to provide username and password activate the Password Protection option. This should be used for development sites that have been cloned to a staging site. Or if you are developing a new WordPress website and need to keep it hidden. This will also stop search engine crawlers from indexing the site. Click on Setup to allocate a username and password. Click Generate to generate a strong password and click the “eye” icon to see the generated password. Entering a username and password and clicking Protect will auto-enable the password protection.

A user will be presented with a standard HTTP authorization dialog when accessing the protected website.

(12) Import
The Import function allows you to import a domain under your control that is hosted on a remote server. The Import button takes you to the Website Importer tool that is located in Websites & Domains.
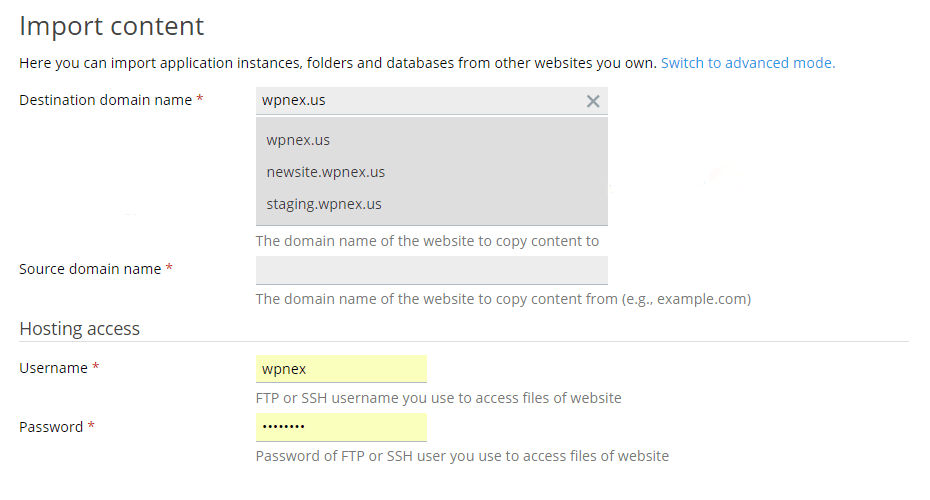
In the basic mode you configure these options:
- Destination domain name – This only appears if you have multiple domains or subdomains. You can import to any of them.
- Source domain name – The remote domain that you control to copy content from.
- Username/Password – The FTP or SSH user/pass you use to access the remote domain.
Select the “Speed up file transfer by using web streaming (beta) when possible” checkbox if you have a large number of small files to import. If you suspect that the import process may be interrupted due to an unstable Internet connection you can try this option. It enables Plesk to resume and interrupted import instead of starting over. Also, under Advanced Options, if the PHP GET option is used it is likely you will have an insufficiently large PHP maximum execution time on the remote domain. The streaming method will circumvent this setting.
The Importer also has an Advanced Mode with the follow extra options:
- Source website URL – Specify full URL of the website, which corresponds to the source document root. (E.g. https://domain.com/blog/).
- Source document root – Specify a path related to FTP/SSH root. The path should be available by HTTP. (E.g. /public_html on Cpanel and /httpdocs on Plesk).
- Connection type – Automatic, FTP and SSH. Useful for SFTP.
- Files root – Path to start scan for files, applications and document root, related to FTP/SSH root. When not specified, default is used: FTP root or home directory of SSH user.
- SSH port – Displays when SSH connection type is selected.
- Get list of files mode – Automatic, FTP/SSH, PHP, PHP with FTP/SSH Fallback.
- Way to transfer files – Displays when SSH connection type is selections. SSH transfer options are rsync and SCP.
Once you’ve configured your Import settings click OK and the Importer will first connect to your target domain and scan the contents.

Once connected it will detect a WordPress instance on the target domain and any extra folders and databases. Before continuing make sure you understand that the Import process will overwrite existing files on the new server.

The Importer will auto-detect WordPress instances and import files and the database related to that WordPress instance. Click the checkbox next to the source installation path and click Start Import.

If your WordPress instance is installed in a sub-directory like /blog you can still import your root domain’s folders. If you have multiple databases the Importer can also detect and import them.

Please be aware that the standard importer takes some time. Allow 10 minutes for 1gb data on average. Time for a snack and coffee! The Importer will work in the background and the page can be closed if needed. Hopefully when you get back you’ll be rewarded with:

(13) Plugins
The Plesk WordPress Toolkit allows you to manage all your plugins from the GUI. You can install new plugins, upload plugins, activate, deactivate and manually update plugins.

(14) Themes
Just like the plugin manager you can also manage your themes in the Plesk WordPress Toolkit. Search and install new themes, upload your premium themes, uninstall and update existing themes.

(15) Database
Under the Database tab you can directly open phpMyAdmin and edit your database username and edit its password.

 (16) Refresh, Detach and Remove
 (16) Refresh, Detach and Remove
Refresh
The rotating circle icon is Refresh. If you have made changes inside your WordPress dashboard click Refresh to sync those changes with the Toolkit. Refresh also runs automatically once a day.
Detach
Under the hamburger menu icon you will see Detach. This will make the WordPress instance disappear from the Plesk WordPress Toolkit but the files and database will remain. This can be helpful if cloning was done manually but a new database wasn’t created on the main domain. There are scenario’s like this where a staging site and main domain might share the same database. Removing the staging site would remove the database. In these cases the Detach feature can be useful.
Remove
Nothing exciting here. This is how you remove your WordPress instance.
(17) Scan
The Scan feature will scan your domain for any WordPress instances and add them to the Plesk WordPress Toolkit if they are missing. This is for WordPress instances that were installed manaually and not via Plesk.
Happy WordPressing!

Add Comment