
In the online storage world there are 3 main players – DropBox, Microsoft OneDrive and Google Drive. DropBox allows 2gb on their free plan and OneDrive allows 5gb. Google Drive offers 15gb of free online storage space. It’s the perfect size for backing up a growing WordPress site. Unfortunately getting automated backups to Drive is notoriously difficult with a minefield of API configuration. There are some tutorials out there but they are all outdated and Google is always changing things in its various interfaces. So here is a step-by-step guide on how to backup WordPress to Google Drive with UpdraftPlus (2017) – a popular backup plugin.

Backup Layers at HN
When it comes to backups at HostNexus we have our clients covered. We’ve learned a lot about backups and DR (disaster recovery) over the years and some of those lessons have been costly and painful. But because of our experiences we have built a fantastic backup system that can be relied on 99.5% of the time. We backup all data to separate storage devices every day and individual files and databases can be restored by clients from within the Plesk control panel.
We also have a built-in Disaster Recovery strategy in our backup software which enable us to boot a server image in seconds. These backup layers give us extra redundancy so no matter what the situation, we always have our clients’ data. Although I might be proud of what we have built, it only makes sense to be skeptical. No matter where you host, you have to be skeptical. At the end of the day it’s your data and it’s you it means the most to. Treat it accordingly.
Your Backup Redundancy Strategy
Every webmaster should have their own backup strategy. I encourage everyone to make backups of their critical data whether they be at HostNexus or elsewhere (particularly if you host elsewhere). We pay a lot of attention to our backups and run regular tests to ensure the system is working as expected. In the unlikely scenario that something goes wrong you should have your own backups, your own disaster recovery plan.
Our clients can take Plesk backups of their data and store locally in their account or store in a remote FTP location. Clients can also backup their data to DropBox from within Plesk. If you use WordPress you can also backup WordPress to Google Drive with UpdraftPlus. We backup hostnexus.com to 2 different locations and I still use this system for our blog. In fact I also do separate backups of external MySQL databases, via cron, to a folder within WordPress and UpdraftPlus sends those to Google Drive too. If it can be done and it costs you nothing why would you not?
How To backup WordPress To Google Drive With UpdraftPlus
This tutorial assumes you have already created your Google Drive account. If you don’t have one go ahead and sign up. A lot of people already have a Google account so adding on Drive is a matter of clicking a button. The only other thing we need is the UpdraftPlus WordPress Plugin. Go to Plugins > Add New and search for “UpdraftPlus”, install and activate.

That’s the easy part done. :)
What we now have to do is create and authenticate a Google API. So before we go into Google Drive go to the Google API Console. If you have never used Google for anything it will be empty.

At the top click Select a project and then the “+” sign to create a new project:

Enter your project name (i.e. Website Drive), agree to the TOS and hit Create:

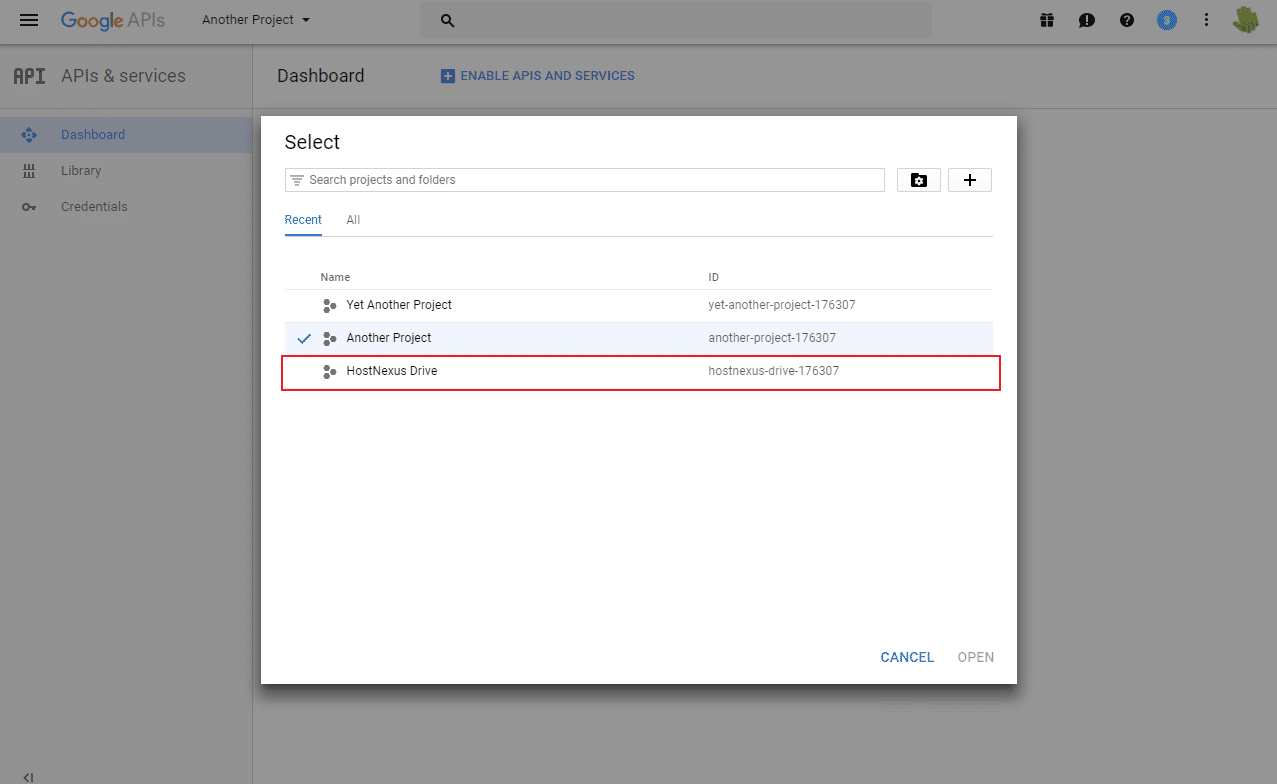
This next step is not all that user-friendly. More often than not after you’ve created a project it still isn’t selected. You may need to click on the projects once again and then select the new project you just created:
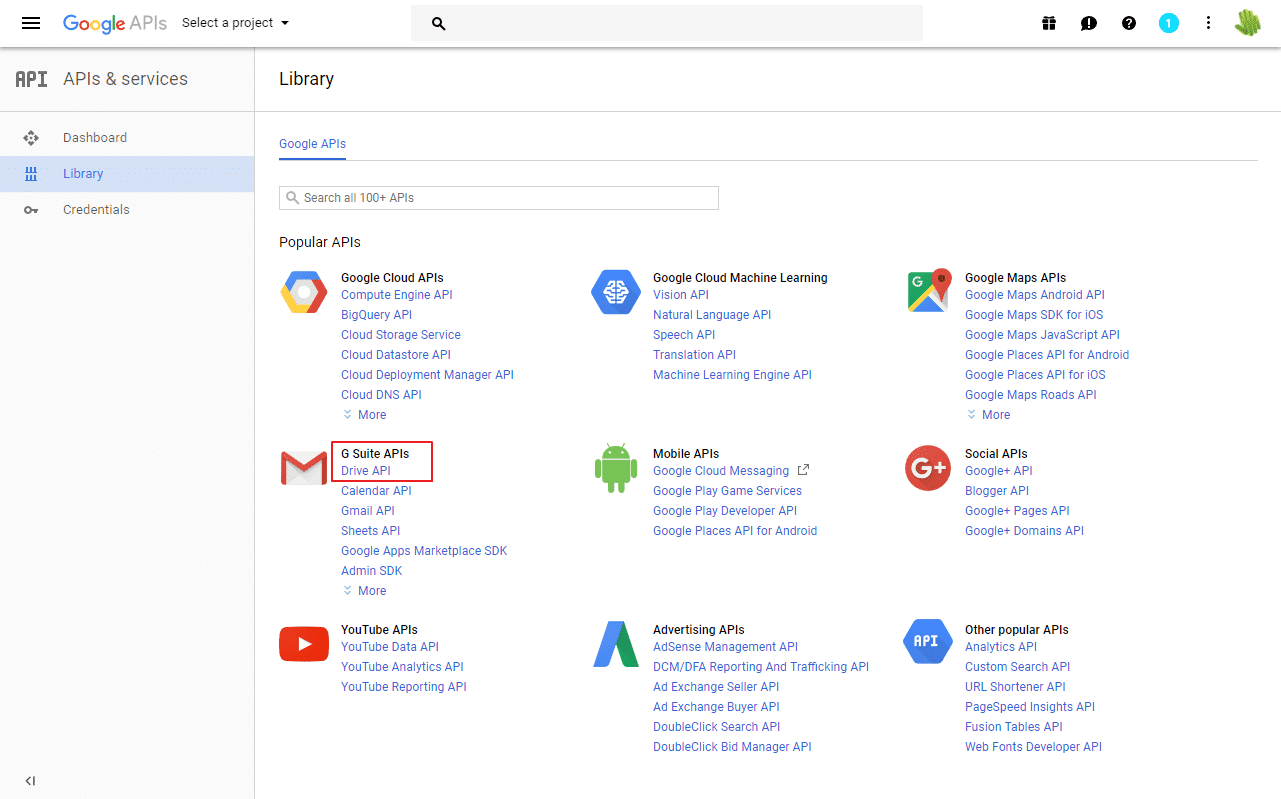
Click Enable API.

The Drive API is under G Suite APIs (at the time of writing this). If you can’t find it just do a search for “Drive” in the search box.
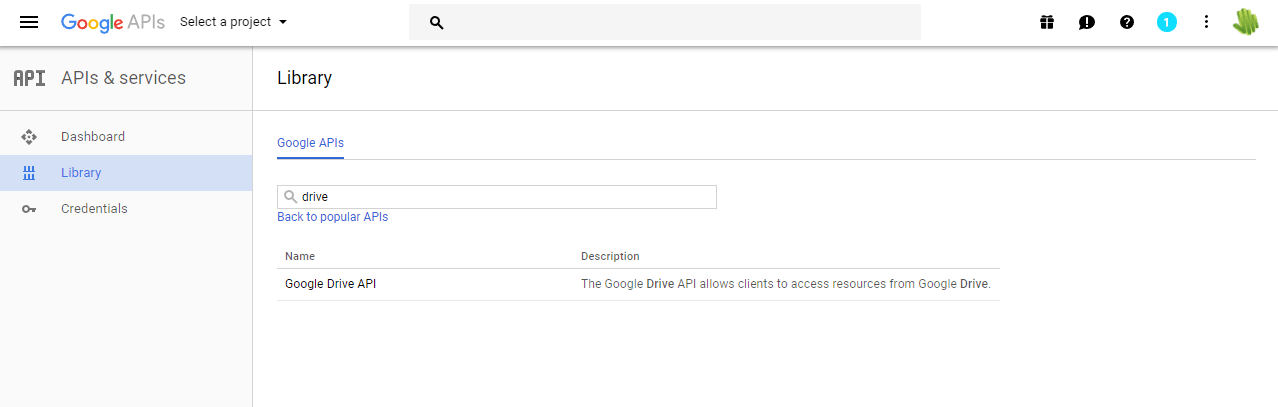
Click Enable.

Click Create Credentials.

On the Add Credentials page click Create an API Key (skip the rest for now).

Give the API Key a name (i.e. “Updraft Backup API“). In the Key Restriction field you want to select HTTP Referrers. Under “Accept requests from these HTTP referrers (web sites” add your domain name and hit Create.

We got ourselves a brand new shiny Google Drive API Key. :)
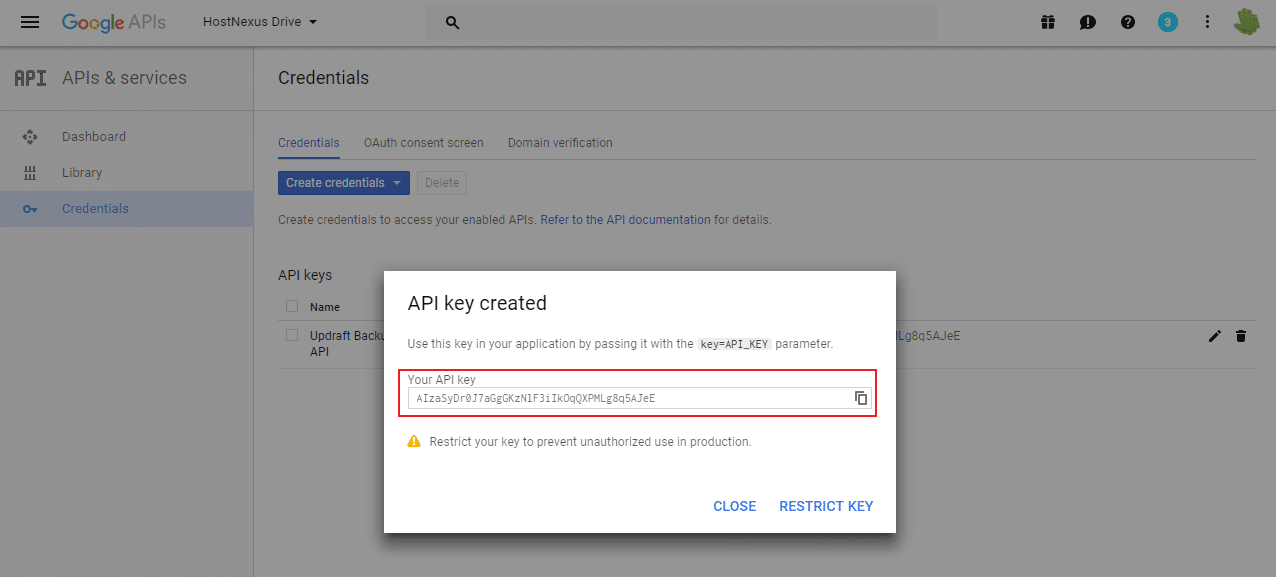
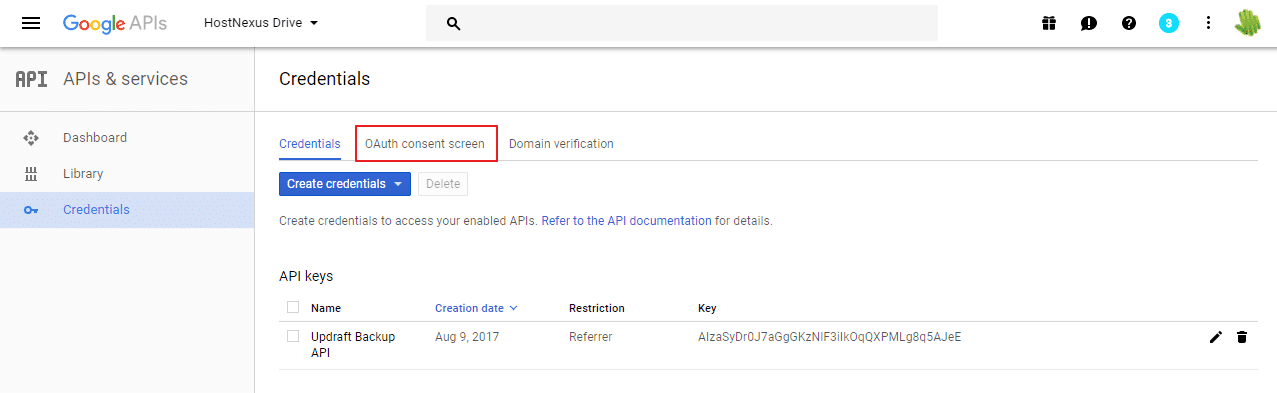
Close the dialog and you’ll be at the Credentials page in the API Console (if not simply click on Credentials). You will see your API Key listed. Next we want to go into OAuth Consent screen.
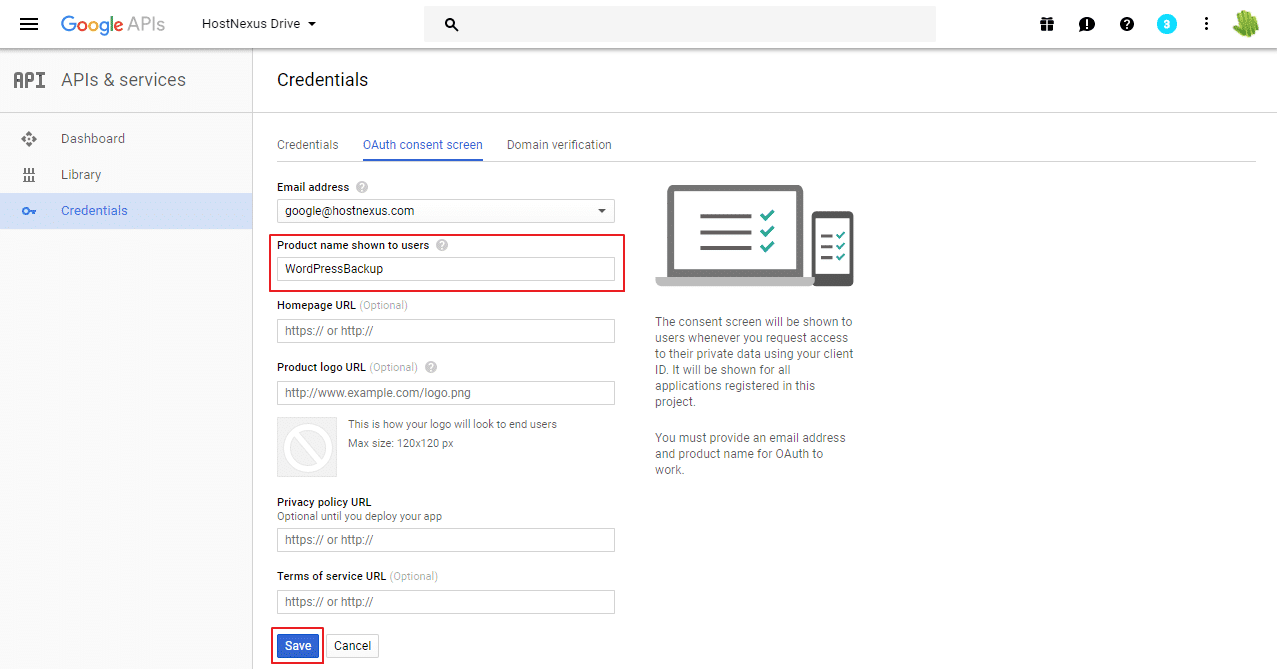
Simply add a Product Name (i.e. “WordPress Backup”) – the rest is optional. Hit Save.
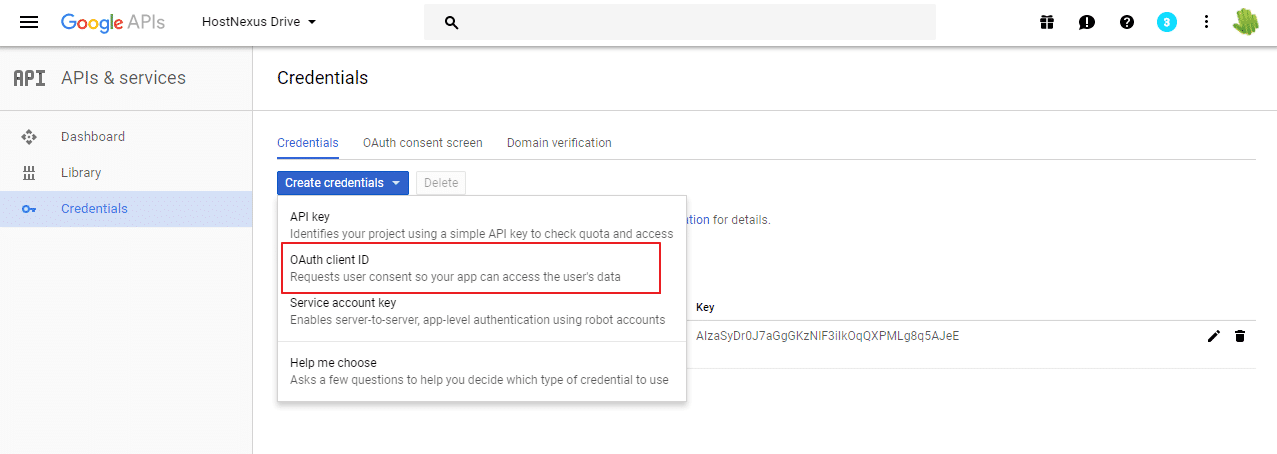
Back on the Credentials page we now need to set up a Client ID to go with this API Key. Click the blue Create Credentials button and select OAuth Client ID.
Under Application Type select “Web Application” and enter a name (i.e. “WordPress Backup“).
In Authorized JavaScript origins you will enter your domain – https://yourdomain.com.
In Authorized Redirect URLs we need to enter the URL you’ll find in Updraft Plus Settings. So head back to your WordPress Dashboard and go to Settings > UpdraftPlus Backups and click on Settings. Select Google Drive.

Scroll down a bit and you’ll see the URL. In our case it is https://www.hostnexus.com/blog/wp-admin/options-general.php?action=updraftmethod-googledrive-auth.
Copy this and paste it back into the OAuth Client ID page. Click Create.

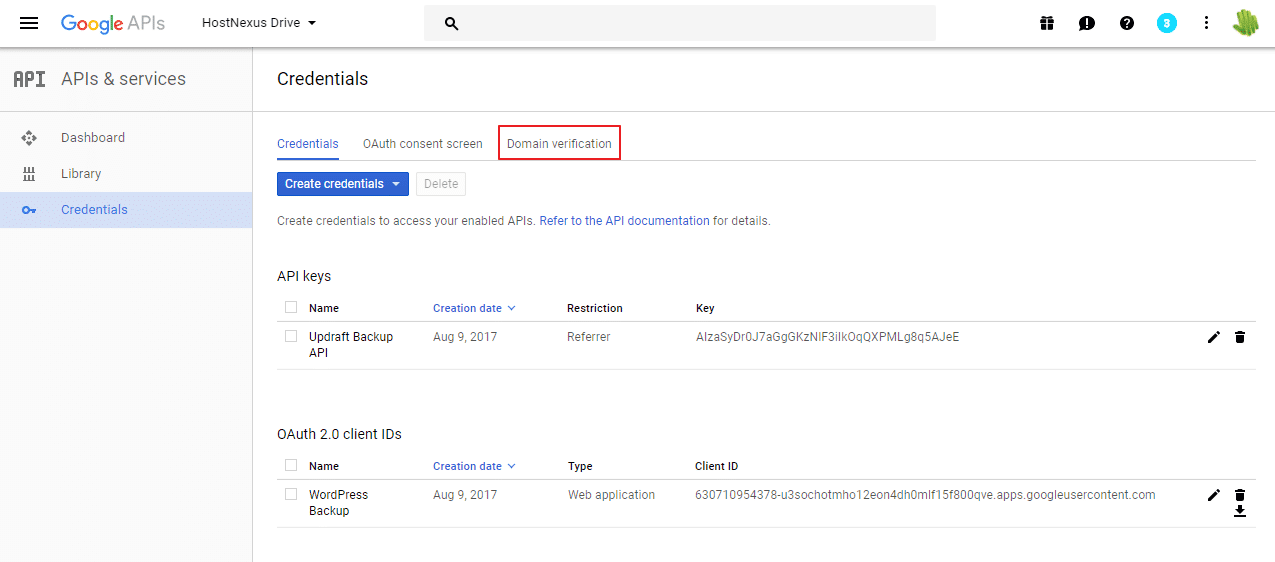
Copy Client ID and Client Secret and keep somewhere. It will still available under the Edit icon next to your OAuth 2.0 Client ID

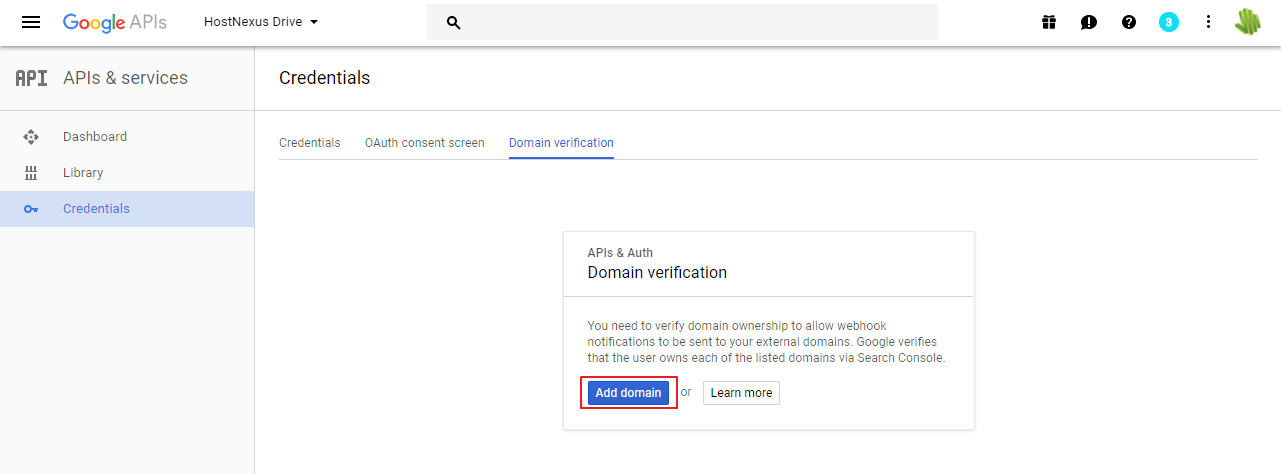
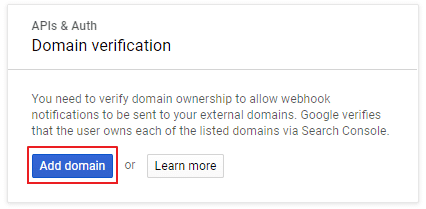
Go to Domain Verification and “Add Domain“.
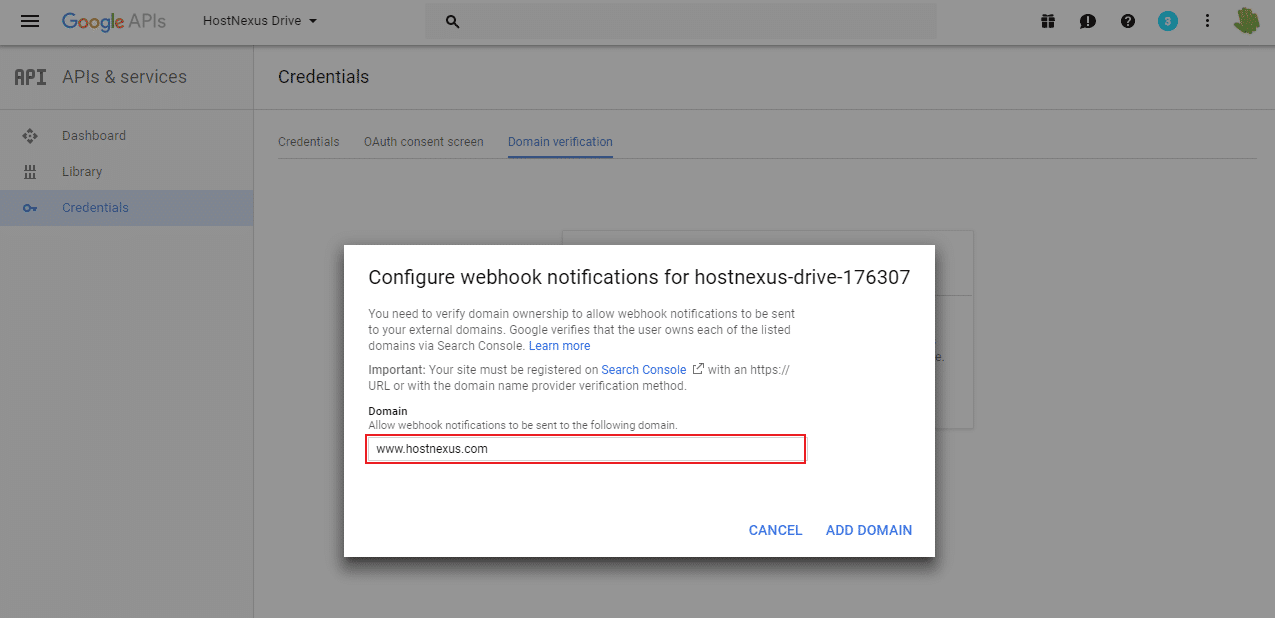
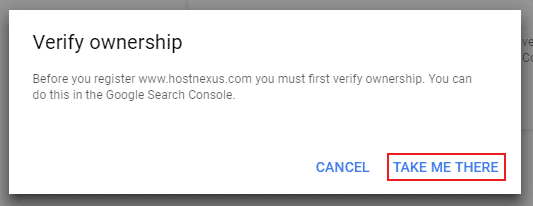
Google will only accept domains that are in the Google Search Console. Most webmasters will have a Search Console (aka Google Webmaster Tools aka Webmaster Central) account but if you don’t you can get verified in a few easy steps. Click Take Me There and login to Webmaster Central.
Select your registrar and create the TXT record. If your domain has your host’s nameservers just go to the DNS Settings in your host’s control panel (Plesk/Cpanel etc) and add the record.

Click Verify.

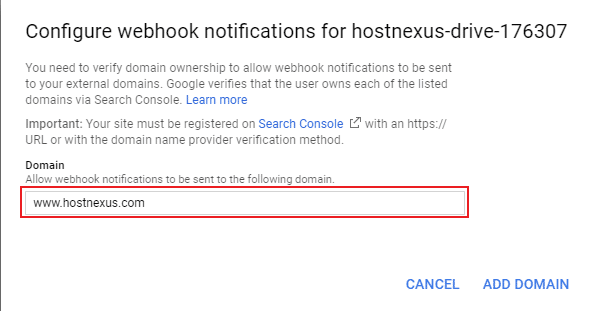
Okay, back to the Google API Console and into Credentials > Domain Verification. If your domain was already in the Google Search Console (Webmaster Central) you’ll already be here. If you just added and verified your domain you will need to Add Domain again.
Finally!

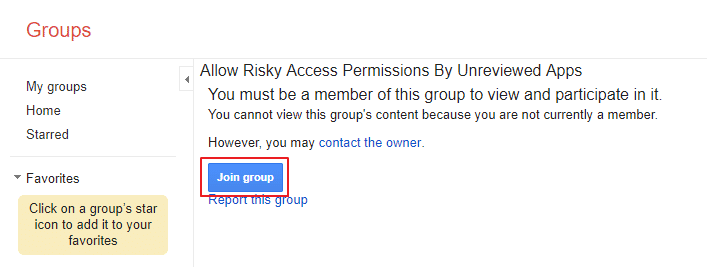
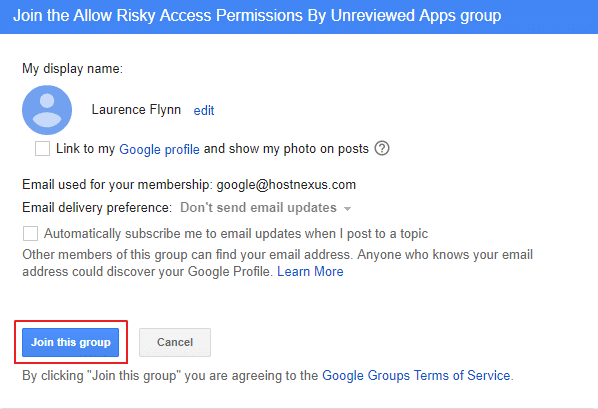
Almost Done! Before we configure UpdraftPlus we need to join a Google Group called “Allow Risky Access By Unreviewed Apps“. This allows webmasters to create personal apps without review from Google. If you miss this step it is doubtful you’ll be able to get UpdraftPlus to authenticate so don’t miss this step. You can always leave the group after authenticating so no big deal. It’s simple though. Load the page and click Join Group“.
Daddy, are we there yet? Almost son. Almost.
Back to UpdraftPlus Settings and input your OAuth Client ID in the Google Drive Client ID field. You should also have the Secret on hand. Remember it’s in API Console > Credentials > OAuth Client IDs > Edit.

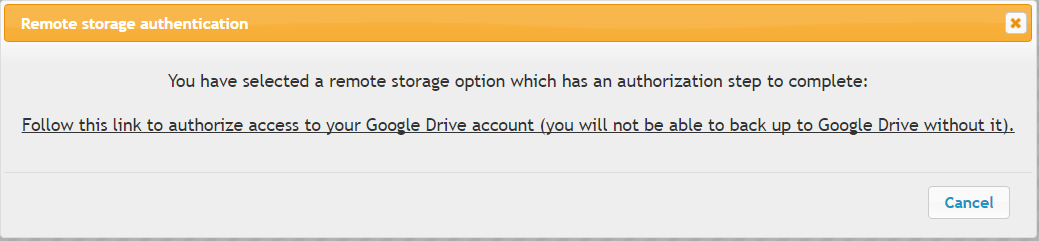
Hit Save Changes. You will now have to authorize UpdraftPlus to access your account. Click on the link to authenticate UpdraftPlus with Google Drive.
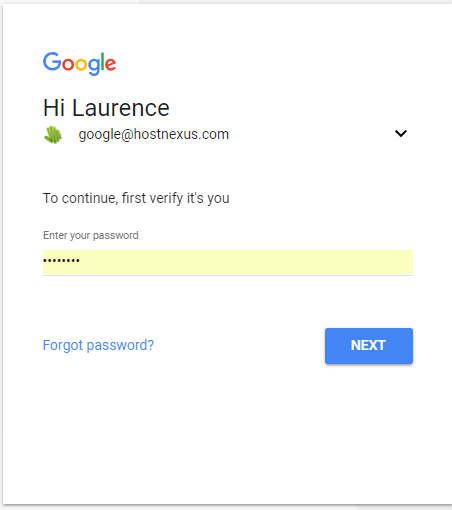
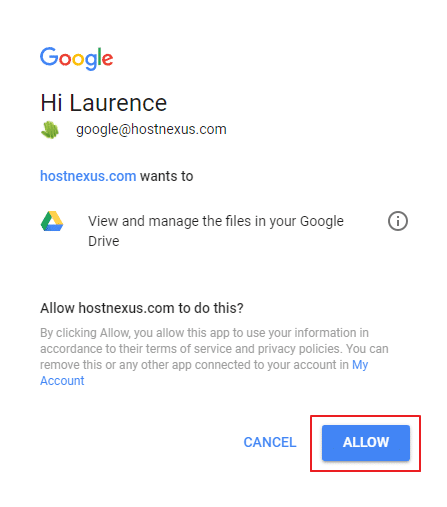
If you have gone through all the steps and joined the Google group as outlined you will be presented with a Google User screen so select your user and Allow access.
If it works you’ll be redirected to WordPress and you’ll see a Success message at the top of the UpdraftPlus page.

If something went wrong and you navigate back to UpdraftPlus you’ll see a message that shows you the account is still not verified. The first time I attempted this I didn’t get redirected and when I tried to do a backup I got an error. Looking at the log showed I was not yet verified. If this happens just go back to Settings, verify your ID and secret is still there, scroll down and hit Save Changes and go through the verification screen again. Hopefully you’ll get redirected and and see the Success message.
Lets test the backup works. Go to Current Status in the UpdraftPlus admin panel and click Backup Now.

We’re going to do a full backup so check the boxes to include the database and the files. And the box to send the backup to remote storage. Click Backup Now and cross your fingers.

Oh yeaaaah, no connection errors and upload in progress. :)

Woo-hoo, no error! Let’s go into Existing Backups and take a look.

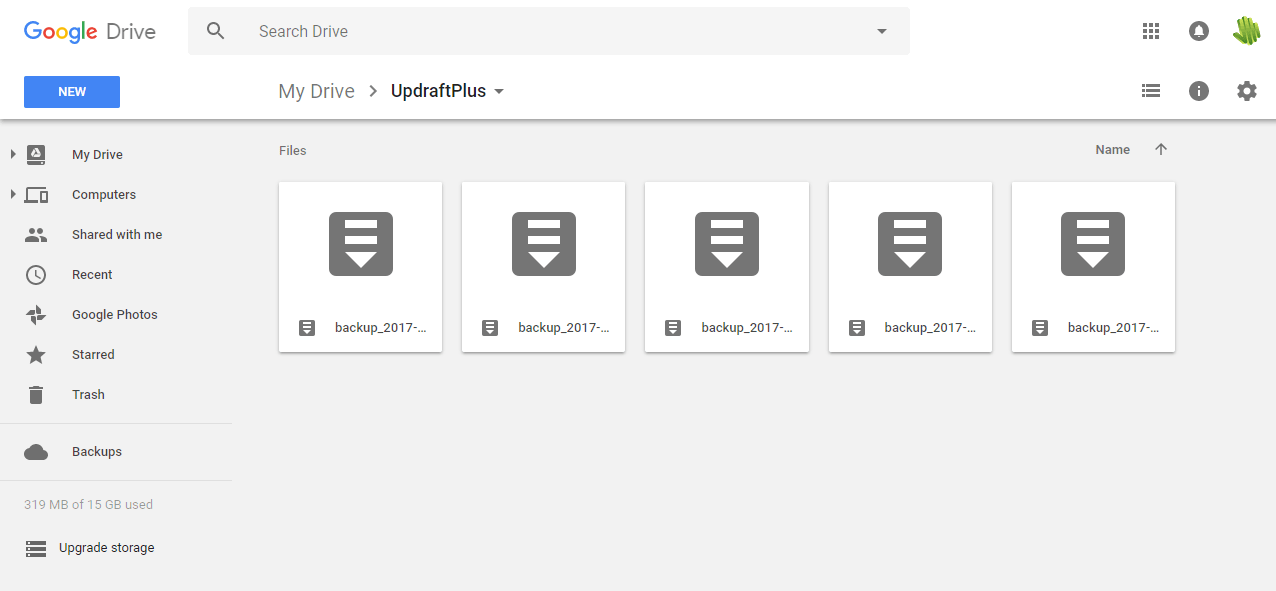
Success! Check out that sweet Drive icon! Now let’s take a look in our Google Drive account to check the backup is really there.
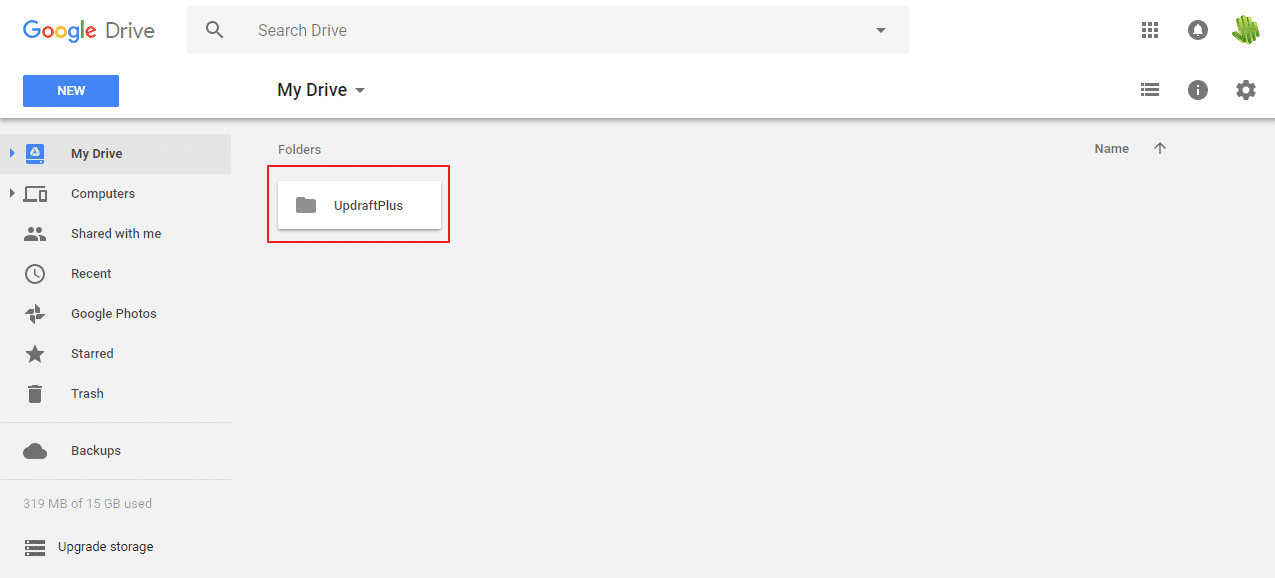
Looking good. Click into that folder to see the backup files. UpdraftPlus creates 5 backup files. One each for the database, plugins, themes, uploads and a file containing any non-standard WordPress files.
We made it, folks.


Add Comment